PHOTON XENON
This document shows how to export a video or audio file containing multichannel audio for use with VYV products.
Step 1: Create your timeline in Resolve
Warning:Be sure to set your timeline frame and resolution to match your project
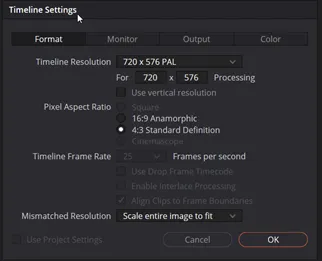 Create your timeline in resolve
Step 2: Add and edit audio tracks
Add audio tracks to your project, make sure to select type a mono.
Warning:Add as many tracks as you need.
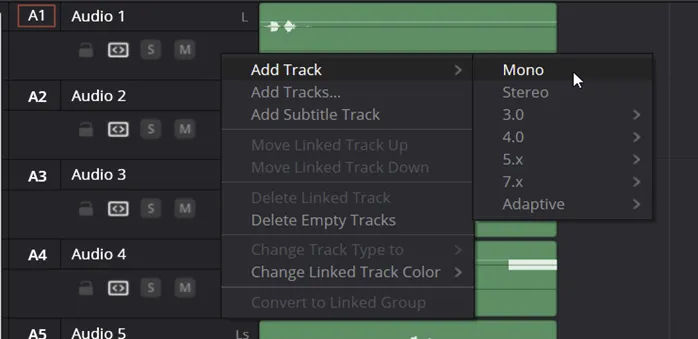 2.1. Add audio tracks to your project, make sure to select type as mono
Add audio files to your tracks
Warning:If you need to convert a stereo or existing multi channel track to mono you can do this using the clip attributes option.
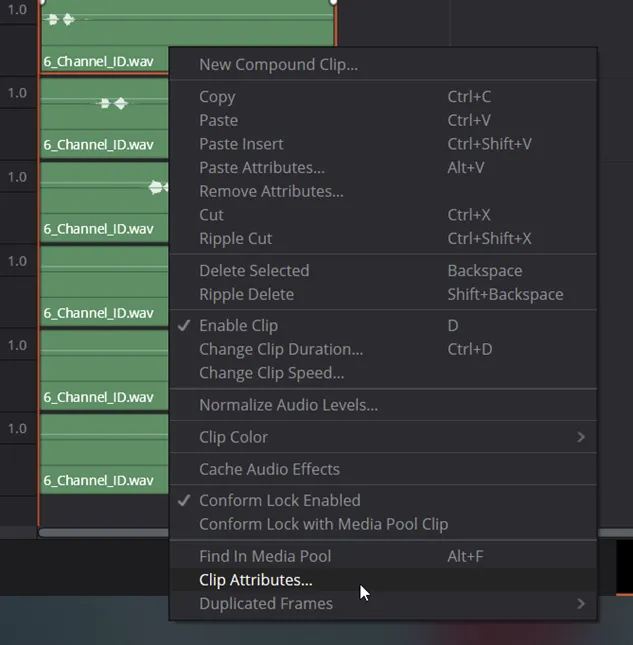 2.2. Add audio files to your tracks
Set clip attributes options to be mono.
Warning:In the clip attributes pane, change the format to mono and select the desired channel.
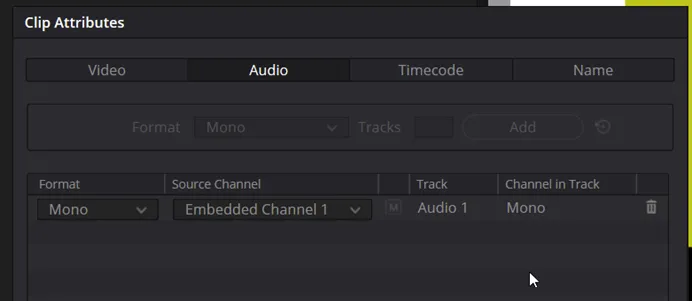 2.3. Set clip attributes options to be mono.
Edit and adjust audio as required, you may also wish to add a movie, picture or text to your file.
Warning:If you wish to ‘burn in’ timecode to your file you can do so by selecting data burn in from the workspace menu.
Selecting REC timecode will use the value set for your timeline.
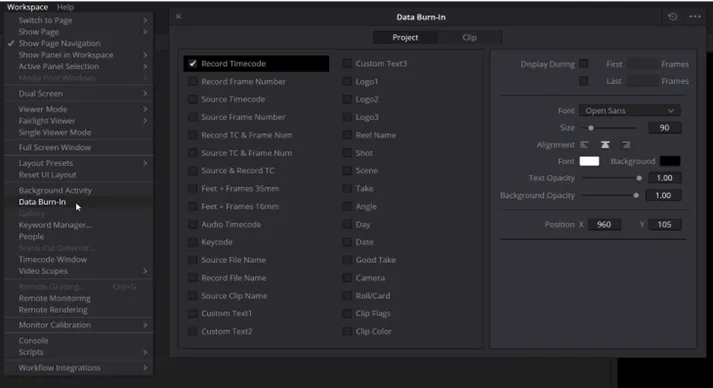 2.4. Edit and adjust audio as required, you may also wish to add a movie, picture or text to your file.
Step 3: Link audio in Fairlight
Switch to the Fairlight Tab.
Warning:Fairlight will use surround terminology such as LCR (left center right) or 5.1 as opposed to discrete names.
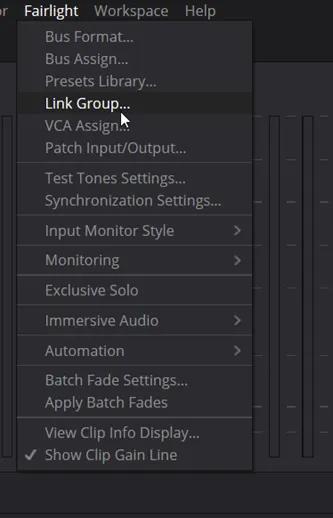 3.2. From the Fairlight menu select link groups.
Select tracks and link them.
Warning:Fairlight will use surround terminology such as LCR (left center right) or 5.1 as opposed to discrete names.
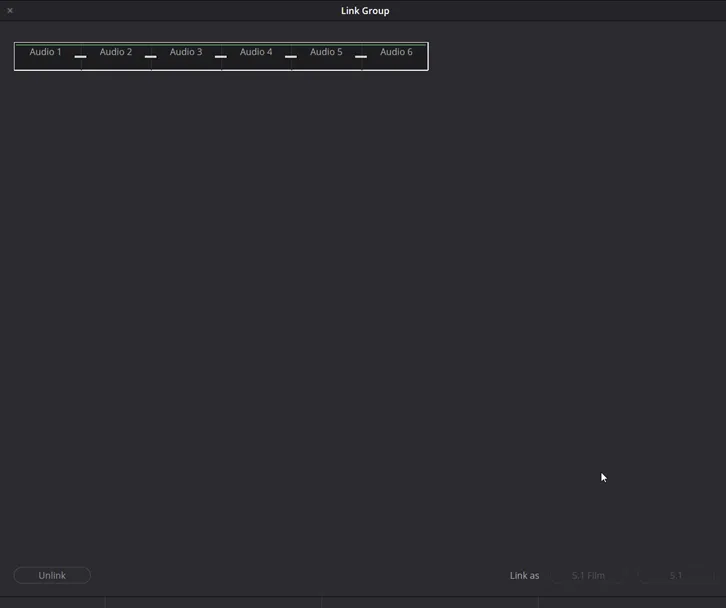 3.4. Select tracks and link them.
Step 4: Export the File
Switch to the deliver tab.
Set the audio options.
Warning:Check under the audio options tab, output track should be set to ‘Timeline Track’ and should have the interleaved number of channels shown next to it.
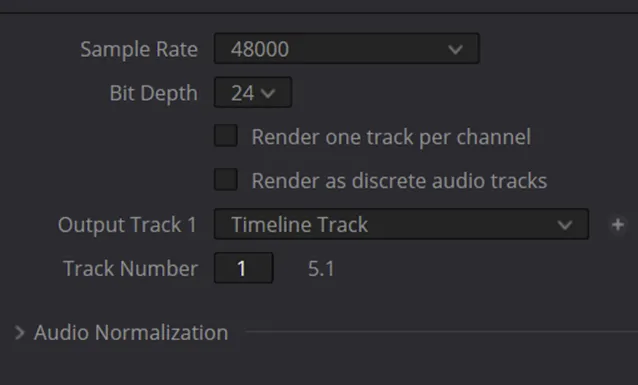 4.3. Set the audio options.